

Getting started
The Complete Workflow (Start Here)
This is the heart of Dancarly. Three steps, repeated: put stock in, log what you sell, and read what it means. Here's how they connect.
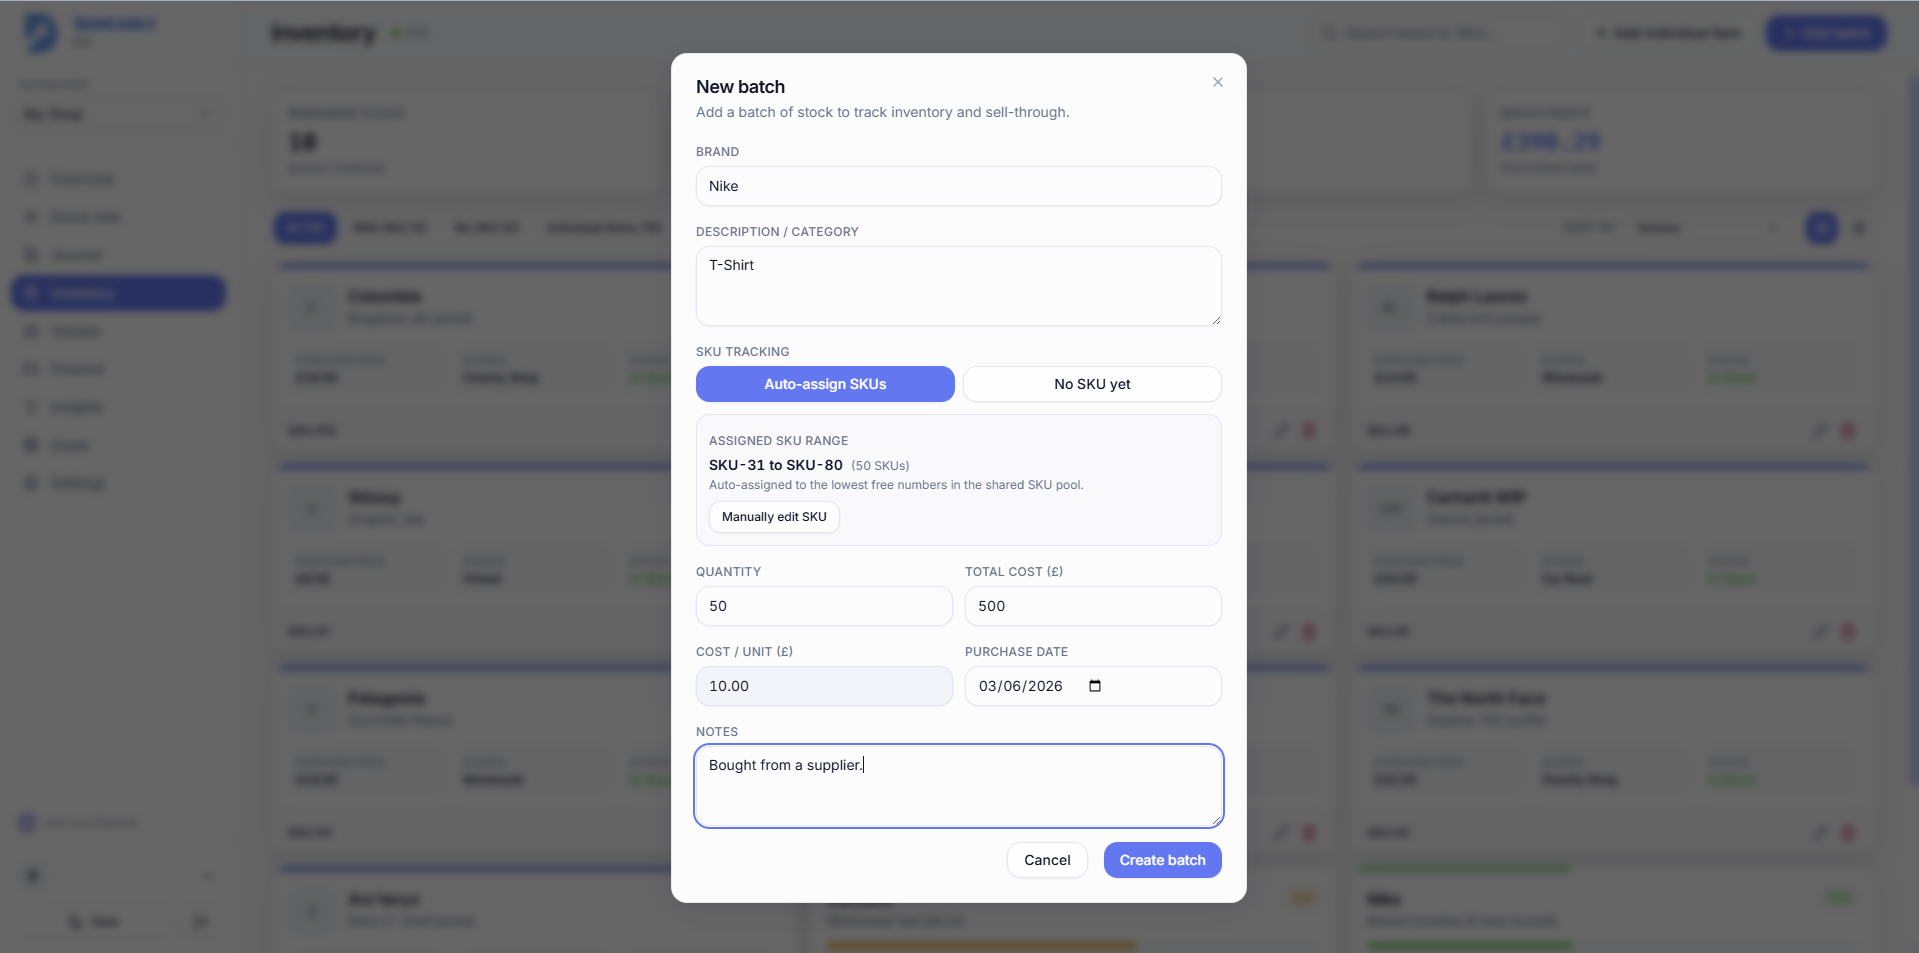
Step 1: Add stock to Inventory
Everything starts with what you bought. Add stock as an individual item (a single piece) or a batch (a lot bought together, e.g. 30 hoodies). Each gets a SKU number so you can find it fast later.
- 1Open Inventory and choose Add individual item or Add batch.
- 2Enter the brand, description, cost and (for batches) the quantity.
- 3Dancarly auto-assigns SKU numbers from your shared SKU pool.
Full detail: Inventory guide.
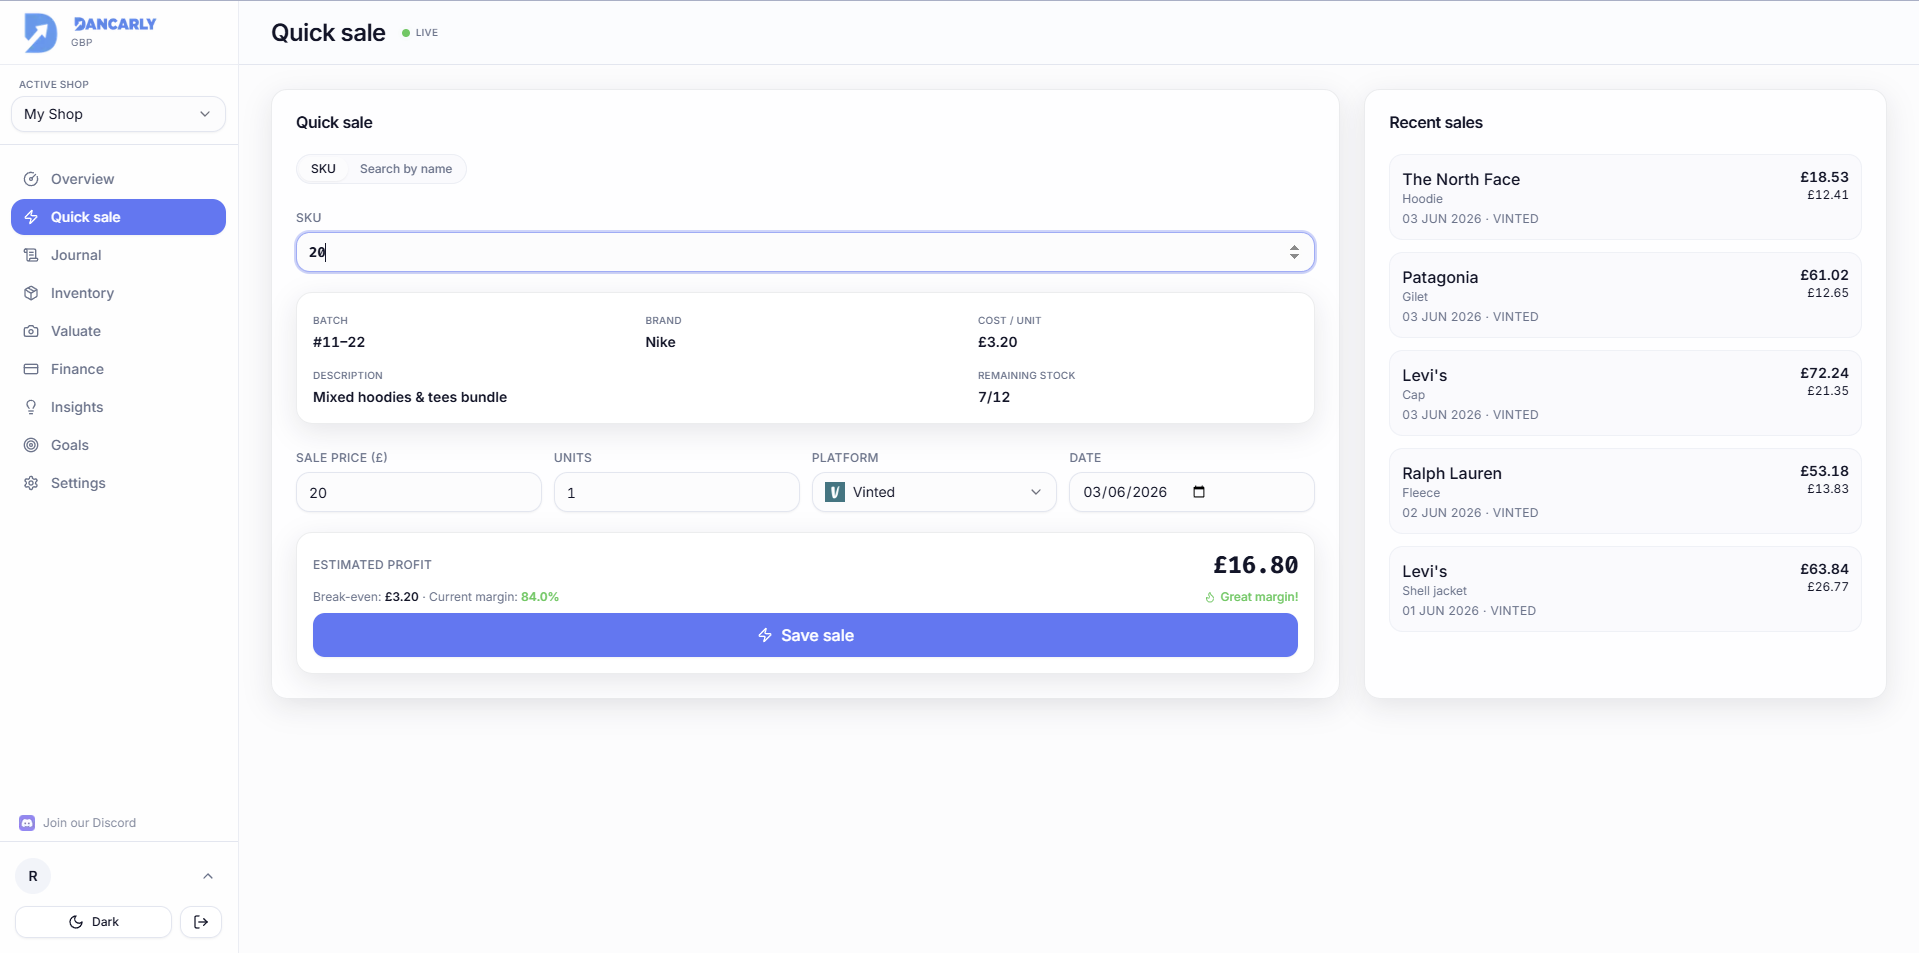
How to actually use a SKU (listing → sale)
A SKU is the thread that links the physical item you listed to the sale you log later. Here's the end-to-end habit that makes tracking effortless:
- 1When you add the item in Inventory, Dancarly assigns it a SKU like SKU-7.
- 2When you list it (e.g. on Vinted, eBay or Depop), write that SKU in the listing description, a short line like “SKU-7” at the bottom is enough. Buyers ignore it; it's your reference.
- 3When the item sells, open the order and read the SKU from your own description so you know exactly which piece went.
- 4In Quick Sale, type or search that SKU. The correct item (and its cost) loads automatically, enter the sale price and save.
Tip
Step 2: Log a sale with Quick Sale
When something sells, log it in seconds. Quick Sale links the sale back to the stock you added, so your remaining inventory and profit update automatically.
- 1Open Quick Sale and find the item by SKU or by name.
- 2If a product has more than one batch, pick the exact batch you sold from (they can have different cost prices).
- 3Enter the sale price (per unit) and units, choose the platform and date, then save.
Full detail: Quick Sale guide.
Step 3: Read your numbers
Now the data works for you:
- Overview, net profit, revenue, margin and number of sales for the period, at a glance.
- Finance, the full money breakdown (gross vs net, expenses, refunds) and CSV/PDF export.
- Insights, best brands & platforms, sell-through and stale stock.
- Goals & Forecast, a monthly target and an adaptive daily forecast.
How it all connects